
What is Weka?
The Waikato Environment for Knowledge Analysis, more commonly known as Weka, is a machine learning software developed by the University of Waikato in New Zealand. It is a collection of machine learning algorithms and data preprocessing tools that are ready-to-use for data mining tasks. Weka is suitable for both beginners just starting with machine learning, as well as for research scientists. Its robust suite of features, ease of use, and the fact that it’s open source has made it popular in both academia and industry.
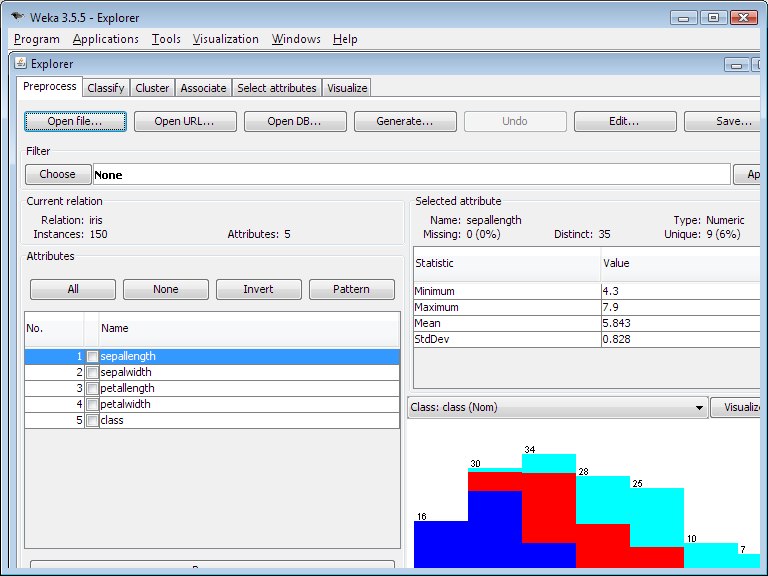
Weka GUI screenshot, from the Weka Wikipedia page.
Key Features
Here are some of the key features that make Weka an appealing tool for machine learning practitioners:
- Comprehensive: Weka provides a wide array of algorithms and tools for data analysis and predictive modeling. It includes tools for tasks like data preprocessing, classification, regression, clustering, association rules mining, and visualization.
- Ease of Use: Weka has a user-friendly graphical user interface (GUI) that makes it easy to import data, design, and run machine learning experiments. This allows users to quickly apply machine learning techniques to their data without getting lost in the intricacies of programming.
- Extensible: Weka is written in Java, which means you can customize and extend its functionality according to your needs. It also supports the development of new machine learning algorithms.
- Well-documented: Weka has comprehensive online documentation and a strong community of users, which is a significant advantage for beginners or anyone who might get stuck.
- Integration: Weka can be integrated with other popular data science tools like Python, R, and SQL databases.
While much of larger scale machine learning production and research have moved on from Weka, there is still a base of users finding Weka useful for manageable dataset sizes. For beginners, Weka provides a fantastic interface to practice and understand machine learning and other important aspects of a machine learning pipeline.
Setting Up Weka
To get started with Weka, you will need to download and install it on your system. The software is available for download on the official Weka website and supports multiple operating systems including Windows, Linux, and Mac OS.
After successful installation, you can launch the Weka GUI by clicking on the ‘Weka GUI Chooser’ shortcut that is created. The GUI Chooser provides access to different interfaces such as the Explorer, Experimenter, KnowledgeFlow, and Simple CLI.
Using Weka for Data Analysis
Here are the basic steps for performing data analysis with Weka.
1. Loading Data
The first step in any data analysis is loading your data. Weka accepts data primarily in ARFF (Attribute-Relation File Format) or CSV (Comma Separated Values) format. You can load data by clicking on the ‘Open file’ button in the ‘Preprocess’ tab.
2. Preprocessing
After loading your data, you can use the ‘Preprocess’ panel to apply various filters to transform or clean your data. Weka provides a wide range of filters for tasks like attribute selection, normalization, and discretization.
3. Applying Machine Learning Algorithms
Once the data is preprocessed, it’s time to apply machine learning algorithms. You can choose from a plethora of algorithms under ‘Classify’, ‘Cluster’, ‘Associate’, ‘Select attributes’, and ‘Visualize’ tabs.
4. Evaluation
Weka provides several options for evaluating the performance of machine learning models like cross-validation, splitting the data into training and testing sets, and using a separate test set.
5. Visualization
Finally, you can visualize your results in the ‘Visualize’ tab. Weka offers various types of plots, including scatter plots, histograms, and ROC curves.
Case Study: Iris Dataset
Let’s step through a case study with Weka, using the Iris dataset.
Step 1: Loading the Data
After launching Weka, we’ll start by opening the dataset.
1. Click on the ‘Explorer’ button in the Weka GUI Chooser.
2. In the Preprocess tab, click on ‘Open file’.
3. Navigate to the location of the Iris dataset on your computer. The Iris dataset comes preloaded with Weka and can be found in the ‘data’ folder of your Weka installation directory.
Step 2: Exploring the Data
Once the data is loaded, you can see instances (rows) on the top right corner, and attributes (columns) on the left. The Iris dataset has 150 instances and 5 attributes, namely, ‘sepallength’, ‘sepalwidth’, ‘petallength’, ‘petalwidth’, and ‘class’. ‘class’ is our target variable, and it has three possible values: ‘Iris-setosa’, ‘Iris-versicolor’, and ‘Iris-virginica’.
Click on each attribute to see its properties and a histogram below.
Step 3: Preprocessing the Data
The Iris dataset is already clean, so no preprocessing is required. If you were using a dataset that required preprocessing, you would select filters from the ‘Filter’ panel.
Step 4: Applying Machine Learning Algorithms
Once our data is ready, we can move on to building a model.
1. Switch to the ‘Classify’ tab.
2. Under ‘Classifier’, click ‘Choose’ to select a classifier. For this case study, let’s use ‘trees.J48’, which is Weka’s implementation of the C4.5 decision tree algorithm.
3. In the ‘Test options’ section, select ‘Use training set’ to evaluate the classifier on the same dataset.
4. Click on the ‘Start’ button to start the classification process.
Step 5: Evaluating the Model
After the classification process is completed, Weka displays the results in the Classifier output area.
- Model Details: The section starting with “J48 pruned tree” shows the decision tree generated by the algorithm.
- Summary: The next section is a summary of the performance of the model, including correctly and incorrectly classified instances.
- Detailed Accuracy By Class: This section gives detailed accuracy metrics such as Precision, Recall, F-Measure, ROC Area for each class.
- Confusion Matrix: The last section is a confusion matrix which provides a tabular summary of the actual vs predicted classes.
Step 6: Visualization
Finally, you can visualize the results by clicking on the `Visualize` button. This will open a new window where you can explore different visualizations.
This was a basic walkthrough of a machine learning task in Weka. With this foundational understanding, you can now start exploring more complex datasets and various other algorithms that Weka has to offer!
Conclusion
Weka is a powerful tool for anyone interested in machine learning and data mining. It offers a user-friendly interface and a rich collection of algorithms and preprocessing tools. The walkthrough above shows how simple and efficient it is to carry out a machine learning project using Weka. Whether you’re a beginner starting your journey in machine learning or an experienced researcher, Weka has something to offer you. So, start exploring Weka and unearth the valuable insights hidden in your data!